Nowadays, businesses are switching to the cloud environment because it gives robust data security and management. For Microsoft users, what is better than Office 365? The cloud platform is too easy-to-operate and needs less technical assistance for data management. However, it is a subscription-based application it saves time and effort for users. Recently, several MS Outlook for Mac users complained of the slow performance of MS Outlook because of the large OLM files. How about archiving some important emails on Office 365? You must be wondering about the way to archive OLM files in Office 365. It is why the article is created. It reveals manual and third-party solutions to export all OLM files to Office 365. With the help of the IMAP protocol, users can export emails from OLM to Office 365. Let’s discuss first the manual conversion and then the direct solution to achieve this.
Table of Contents
Export OLM to Office 365 manually
Below are the steps to follow to archive OLM databases to Office 365.
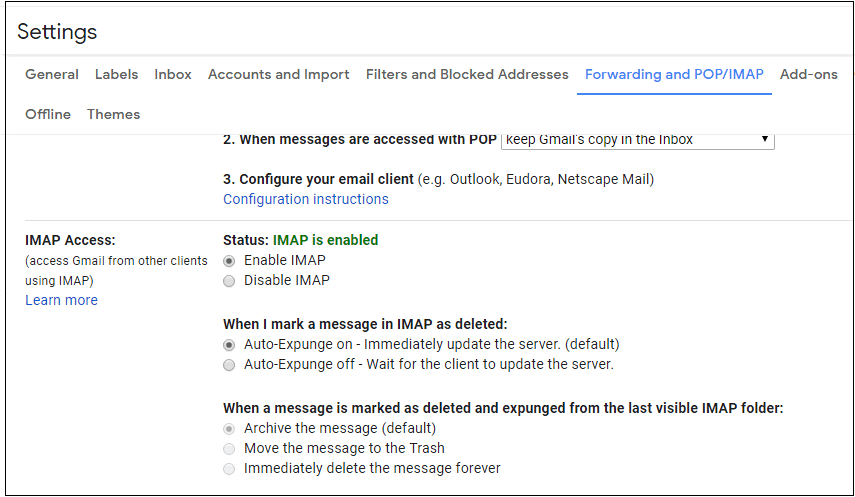
- First, access your Gmail account and take the cursor to account settings. It will open the setting window. In the “Forwarding and POP/IMAP” tab, just enable “IMAP” and press the “Save changes” button.

- After that, access your MS Outlook account and navigate to the Tools tab, and choose Accounts.
- It will open a new window. In the lower-left corner of the window, click on the “+” button to integrate your Gmail account with Mac Outlook.
- To connect the Gmail account, provide the correct user name, its passwords, the outgoing server, the incoming server, and all the details it requires. Finally, press the Add Account” tab.
Note 1: Don’t forget that the incoming server for Gmail is “imap.gmail.com,” and the outgoing server is “smtp.gmail.com.”
Note 2: Carefully check the “Use SSL to connect” for each server.
It is how your Gmail account connects with Mac Outlook.
The next step is the synchronization of the Gmail label to Mac Outlook.
- Access your Gmail account and straight go to the gear tab. From the drop-down list, hit the Settings tab and then choose Label.
- Generate a new label by hitting the Create new label tab.
- After this step, access the targeted Mac Outlook account and update the IMAP mailbox by clicking on the Send/Receive button.
- Once it is updated, you can synchronize the OLM file with the IMAP email account. Export the OLM file data to the IMAP account.
Once the data is exported to the IMAP account, configure your MS Outlook for Windows with this IMAP account and transfer data to the PST file extension. After that, you can use a PST to Office 365 Conversion tool or a manual method to transfer PST to Office 365.
Manual Conversion of PST to Office 365
Do you know you can export PST databases to Office 365 manually? The process is easy to achieve, but it is efficient for importing a single or a couple of mailboxes. If you want to transfer entire emails of PST, then a third-party tool is useful. Below are the steps to follow.

- First, open your MS Outlook for Windows app and go to the File menu
- From the drop-down, choose Open & Export
- Click on Import/Export
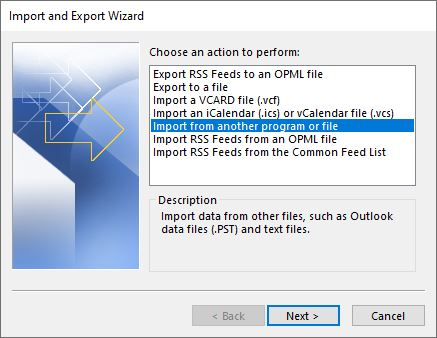
- Then, from multiple options, select the Import from another program of a file (it is always selected by default. If it is not specified, you can select it manually.)
- Choose Outlook Data File (.pst)
- Choose the recently transferred OLM to the PST file
- On the next screen, you can filter what you like to import and where.
- Press the Finish tab to start the import process
Wait for a few minutes to complete the process. The time to import emails depends on the file size. However, the above method is quick and easy to achieve. It is useful for sending a couple of emails.
Drawbacks of the Manual Method
- How do you find the above-mentioned methods? Does it seem so lengthy and time-consuming? Therefore, users like to use a third-party application over manual solutions.
- While transferring OLM data to IMAP, there are chances of losing your crucial databases because of the poor Internet connection, antivirus interruption, sudden shutdown of the system, etc.
- Moreover, it is not a complete solution. With OLM to IMAP manual conversion, only emails and messages are exported. It indicates that users cannot transfer entire OLM data to Office 365 manually.
- For beginners, these manual methods are not so comfortable idea. Users who have in-depth technical skills can consider manual conversion.
- Therefore, the finest solution to convert the OLM database into Office 365 is to try an automated conversion.
Export OLM to PST

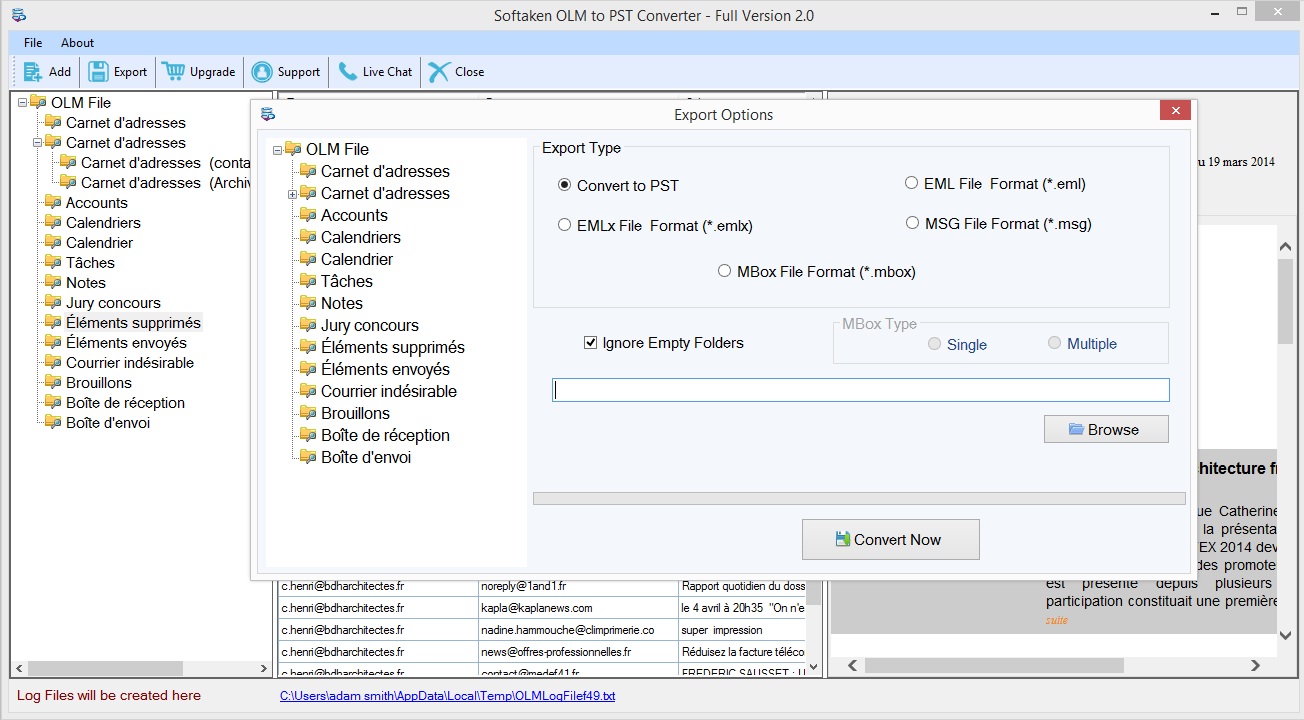
It is easy to export PST files to Office 365. You can use an OLM Conversion application. OLM to PST Converter is an ideal application to use on your Windows system. The application manages to export entire or selective OLM folder data to PST in no time. The best thing about the application is that it doesn’t need technical proficiency to export data. Conversion results are accurate every time. No data is corrupted or goes missing during conversion. The process of migration is easy. A novice can configure and run the program independently. Conversion of OLM files to Personal Storage Table doesn’t need pre-installation of MS Outlook for Windows and MS Outlook for Mac. The license of the tool is valid for an infinite duration. It suggests users can use the tool as long as they desire. The transformation app is a well suitable choice for companies and individuals using MS Outlook heavily.


